
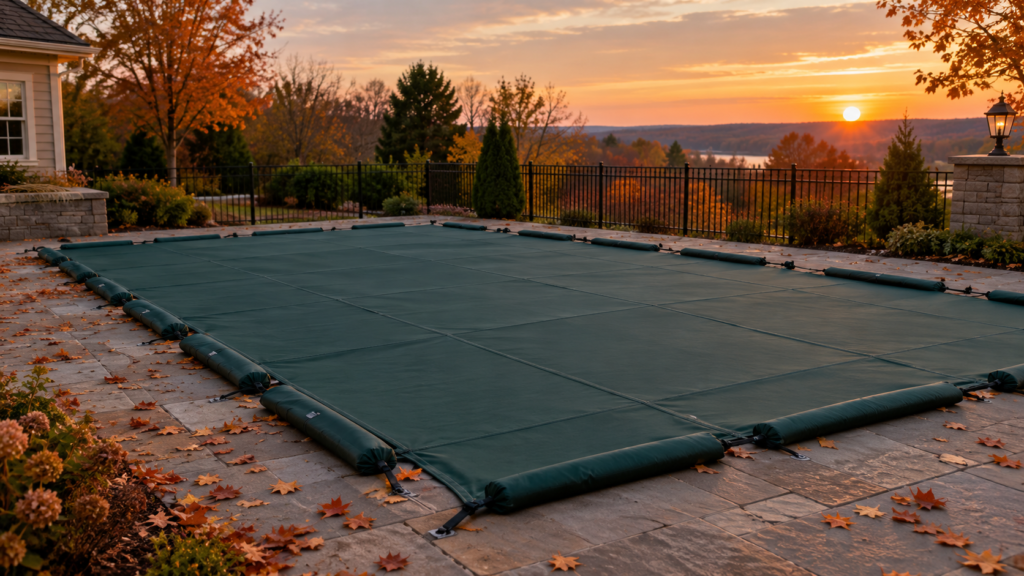
Preparing to winterize an inground pool before temperatures approach 65°F at night is likely your next concern. The job takes about three days, and you can do it yourself with the quantities, tables, and steps below. This guide on how to close an in-ground pool covers the chemicals, the water level, the plumbing blow-out, and the cover.
This guide covers seasonal winterizing. If you mean permanently filling in or removing a pool, that is a separate job for a licensed contractor.
Quick Answer: How to close an in-ground pool: balance the water (pH 7.2–7.8, alkalinity 80–120 ppm), shock it, and add winter algaecide. For a secure winter cover, drop the water 3–6 inches beneath the skimmer, empty the equipment, clear the plumbing lines using roughly 10 PSI of air pressure, seal the returns, and secure the cover tightly.
Table of Contents
What You Need to Know
- Start once temperatures stay at or below 65°F, and give yourself about three days.
- When winterizing an inground pool, balance the water chemistry before protecting the plumbing. Treat the water 24–48 hours before the cover goes on.
- You don’t drain the pool. The water level needs lowering, but the required depth varies according to your cover style.
- Blowing out the plumbing lines prevents cracked pipes. Don’t rush it.
- A DIY close is realistic with an Air compressor or plumbing blower, along with a wet/dry vacuum.
How to Close Inground Pool for Winter: The 10-Step Overview
Closing an inground pool means cleaning and treating the water, lowering the level, removing water from the plumbing and equipment, and sealing the pool under a cover. The goal is to stop algae over winter and keep freezing water from cracking pipes, pumps, and filters.
Here is how to close an in-ground pool in 10 steps:
- Clean the pool and filter.
- Test and balance the water.
- Shock the water.
- Add winter algaecide and a sequestering agent.
- Lower the water level.
- Drain the pump, filter, and heater.
- Blow out the plumbing lines.
- Plug the lines and add antifreeze.
- Install the cover.
- Secure the cover and check the fit.
When Should You Close Your Pool?
Start closing once temperatures stay consistently at or below 65°F, and finish before the first severe freeze. Cooler water slows algae growth, and starting at 65°F leaves time for the chemicals to circulate.
| Day | Task |
|---|---|
| Day 1 | Clean the pool and filter, then test and balance the water |
| Day 2 | Shock, then add algaecide and sequestering agent |
| Day 3 | Lower the water, blow out the lines, and install the cover |
Keep the pump running while the chemicals circulate. If you aren’t sure how long, read our guide on how long to run a pool pump.
What Chemicals and Supplies Do You Need to Close an Inground Pool?
You need non-chlorine shock, winter algaecide, and a metal sequestering agent, dosed by pool volume. The general guideline is 1 pound of shock, 32 ounces of algaecide, and 16 ounces of sequestering agent per 10,000 gallons. Getting these doses right is the first big part of how to close an in-ground pool without problems.
| Pool volume | Non-chlorine shock | Winter algaecide | Sequestering agent |
|---|---|---|---|
| 10,000 gal | 1 lb | 32 oz | 16 oz |
| 15,000 gal | 1.5 lb | 48 oz | 24 oz |
| 20,000 gal | 2 lb | 64 oz | 32 oz |
| 30,000 gal | 3 lb | 96 oz | 48 oz |
These are general guidelines. Your product label always overrides this table.
Save or screenshot this Pool Closing Dosage Chart. It covers the four most common pool sizes, so you can shop with it in your hand.
Handle these chemicals carefully. According to the CDC, pool chemical injuries lead to over 4,500 emergency department visits each year, and 56% happen at home. Read each label, wear goggles, and never mix different chemicals.
A winterizing kit bundles these three chemicals, so you only need to match the kit size to your pool’s gallons. [AFFILIATE LINK: pool closing chemical kit]
Equipment checklist:
- Winter cover (plus water tubes when required)
- Air compressor or line blower and a shop vac
- Return line plugs, plus Teflon tape
- Skimmer guard (often sold as a Gizzmo)
- Pool antifreeze (never regular automotive antifreeze)
- Channel lock pliers
- Optional: a sump pump, useful for lowering water if you have a cartridge filter
Step-by-Step: How to Close Inground Pool
Do the chemistry first and the plumbing last. Chemicals need time to work, and the cover goes on only after everything else is done.
Part 1: Clean and Treat the Water
- Clean the pool and filter. Remove floating debris, scrub the pool walls, vacuum the floor, and clear the skimmer basket. Use a nylon brush on fiberglass or vinyl, and stainless bristles on gunite. Backwash a sand or DE filter, and rinse a cartridge filter with a hose.
- Test and balance the water. Test chlorine, pH, total alkalinity, stabilizer, and calcium hardness before adding winter chemicals. If your pH is off, see our guide on how to lower pH in a pool.
| Reading | Target before closing |
|---|---|
| pH | 7.2–7.8 |
| Total alkalinity | 80–120 ppm |
| Calcium hardness | 180–220 ppm |
| Chlorine (after shocking) | 1–3 ppm |
Please save or take a screenshot of this Closing Chemistry Targets table. It covers the numbers to hit before you add winter chemicals.
CDC’s Model Aquatic Health Code is written for public pools, but it is a useful reference for how pool water is tested. Check your stabilizer (cyanuric acid) against the range your chemical manufacturer recommends.
- Shock the water. Use 1 pound of non-chlorine shock per 10,000 gallons. It breaks down organic matter and chloramines without adding chlorine, so algaecide can follow. If you use chlorine shock instead, never add it at the same time as algaecide.
- Add winter algaecide and a sequestering agent. Use 32 ounces of winter algaecide per 10,000 gallons. It is formulated to stay active for months. Add 16 ounces of sequestering agent per 10,000 gallons to prevent scale and metal stains. If algae was a problem this season, our guide to mustard algae in pool water explains what to treat first.
Wait 24–48 hours before the cover goes on.
Part 2: Lower the Water and Clear the Plumbing
- Lower the water level. For sand or DE filters, use the waste setting. For a cartridge filter, use a separate sump pump.
| Cover type | Water level |
|---|---|
| Solid or floating | About 3–6 in. below the skimmer |
| Mesh | About 12–18 in. below the skimmer |
| Automatic | Do not lower the water |
Guidance varies on the reference point (skimmer, skimmer faceplate, or tile), so follow your cover manufacturer’s manual.
Save or screenshot this winter water level chart. It covers all three cover types in one view.
- Drain the pump, filter, and heater. Turn off the pump. Remove the drain plugs from the pump, filter, and heater if yours has one, and keep the plugs somewhere safe. Empty the chlorinator and take out any remaining chlorine tablets.
- Blow out the plumbing lines. Attach the compressor to the pump’s drain port with a 1/4-inch nozzle adapter and set it to about 10 PSI. Longer PVC runs may need more.
- For a cartridge filter, remove the cartridge first. For sand or DE filters, set the multiport valve to recirculate.
- Open the skimmer line, and remove the skimmer basket before starting, because air can launch it.
- Run the compressor until you see a steady stream of bubbles, then 20–30 seconds more.
- Switch to the main drain line and repeat. While the compressor is running, close the valve to the pump to trap the air.
- Plug the lines and add antifreeze. Wrap the return plugs with 2–3 layers of Teflon tape before tightening them. Use the shop vac to pull remaining water from the skimmer housing while the compressor runs. Then turn the compressor off and pour pool antifreeze into the skimmer lines. Apply Teflon tape to the skimmer guard and screw it into the opening farthest away from the pool.
Part 3: Cover the Pool
- Install the cover. Unfold it along one short side. With two or more people, pull it across using the handles, and hold the corners down with weights.
- Secure the cover and check the fit. The cover should drape straight down from the deck edge, not slope toward the center. Thread water tubes through the straps and fill them about halfway. The U.S. Consumer Product Safety Commission’s Pool Safely program recommends barriers, covers, and alarms as lifesaving devices, so make sure yours is tight and secure.
Do You Have to Drain Your Pool When You Close It?
No. Proper inground pool winterization requires lowering the water level, not emptying the entire pool. The level depends on your cover: a few inches for solid covers, a foot or more for mesh, and none for automatic covers.
An automatic cover needs the water at a normal level to support itself and any snow on top. Emptying an inground pool is also widely cautioned against in pool-industry guidance, because the empty shell can be pushed by groundwater. Ask a pool professional before you empty yours.
Can You Learn How to Close Inground Pool Yourself?
Yes. A DIY close is realistic if you own or can borrow an air compressor or line blower. Blowing out the lines completely is the hardest part. The rest is cleaning and measured chemical dosing.
Want this as a one-page printable? [EMAIL CAPTURE: “Get the printable closing checklist, plus our spring-opening checklist, by email.”]
Call a professional if:
- You have an automatic cover.
- You can’t fully drain your heater or salt system.
- You don’t know where your plumbing runs.
- You suspect a leak.
What Is the Price of Winterizing an Inground Pool?
The total price varies with pool size, local labor rates, cover style, and the services included. Prices vary too widely to quote one number here.
Doing it yourself mainly costs chemicals, return plugs, and antifreeze, plus a cover if yours needs replacing. Hiring a pool professional means paying for labor to clear the lines and secure the cover. Ask two companies for itemized quotes so you can compare them fairly.
Common Mistakes When You Close an Inground Pool
The most expensive mistake is leaving water in the lines. A few ounces of trapped water can freeze, expand, and crack a pipe or fitting. Most failed jobs on how to close an in-ground pool come down to the items below.
| Mistake | Fix |
|---|---|
| Stopping the compressor when bubbles first appear | Run it 20–30 seconds past the steady bubble stream |
| Leaving the skimmer basket in during blow-out | Remove it first, because air can launch it |
| Using regular antifreeze | Use only non-toxic pool, RV, or marine antifreeze |
| Adding chlorine shock and algaecide together | Use non-chlorine shock, or separate the additions |
| Lowering the water for an automatic cover | Leave it at normal level |
| Skipping the chemistry test | Test before adding winter chemicals |
| Letting the cover slope into the pool | Adjust until it drapes straight down |
For chemical handling, the CDC’s Healthy Swimming program offers safety guidance for home pool owners.
What Should You Check During Winter?
Inspect the cover regularly to confirm that it remains firmly in place. Remove leaves and debris, and follow your cover manufacturer’s manual for standing water or snow. If the cover has shifted, re-secure it before the next storm.
FAQ: How to Close Inground Pool
Which pool chemicals are required for inground pool winterization?
You need non-chlorine shock (about 1 pound per 10,000 gallons), winter algaecide (about 32 ounces per 10,000 gallons), and a metal sequestering agent (about 16 ounces per 10,000 gallons). Add pH, alkalinity, and calcium balancers if your test results are off. Always follow the label dosage.
Can I close my inground pool without draining the water?
Yes. You never drain an in-ground pool for winter. You only lower the water: about 3–6 inches below the skimmer for a solid cover, about 12–18 inches for a mesh cover, and not at all for an automatic cover. Confirm the exact level in your cover manual.
What is the typical expense of winterizing an inground pool?
Cost depends on pool volume, region, cover type, and what a professional includes. Doing it yourself mainly costs chemicals and a few plugs, plus a cover if yours needs replacing. A professional visit adds labor for blowing out the lines and installing the cover. Get two itemized quotes.
Can I close my pool myself?
Yes. Many pool owners can handle the job using an air compressor or plumbing blower, a wet/dry vacuum, winterizing plugs, and pool chemicals. The hardest part is blowing out the plumbing completely. Call a professional if you have an automatic cover, can’t drain a heater or salt system, or suspect a leak.
When should I close my inground pool?
Close it once temperatures stay consistently at or below 65°F, and before the first hard freeze. This gives you a few days to balance and treat the water. In warm climates where water never freezes, you usually keep the pump running instead of fully closing.
How to close an in-ground pool with a cartridge filter?
Remove the cartridge before you start the compressor, and rinse it with a hose. Lower the water with a separate sump pump instead of the waste setting. Everything else follows the same steps: blow out the lines, plug the returns, and install the cover.
Is pool antifreeze necessary after clearing the plumbing lines with air?
Pool antifreeze is an extra safeguard, not a substitute for blowing out the lines. Blow out the water first, then pour non-toxic pool, RV, or marine antifreeze into the skimmer lines. Never use regular automotive antifreeze, which is toxic.
How much time is needed to winterize an inground pool?
Plan on three days: one for cleaning and balancing, one for shock and algaecide, and one for plumbing and the cover. The chemical wait matters more than the labor, because treatments need 24–48 hours to take full effect.
What to Do Next
Now that you know how to close an in-ground pool step by step, plan your next moves:
- Choose your winter cover. [CONTENT GAP: “Best Winter Pool Covers & Closing Kits” roundup — commercial-bridge link]
- Plan your spring opening. [CONTENT GAP: “How to Open an Inground Pool in Spring”]
- Keep algae in check next season. Read about mustard algae in pool water before the weather warms.
